


Control&Brake System Parts
Hangzhou UCAN Trading Co., Ltd
We are prefessional motorcycle spare parts manufacturer &exporter, establlished in Hangzhou since 2009.We have been exporting parts to different countries for many years.We mainly products is full body fairing parts forscootermotorcycle(mainly HONDA/YAMAHA),and OEM quality engin parts for scootermotorcycle&ATV,UTV. We have always maintained a customer-centered philosophy and strive to exceed our customers' expectations and become a leading brand in the field of motorcycle parts and accessories. Whether you are an existing customer or a potential partner, we look forward to establishing a long-term relationship with you and working together to achieve the goal of mutual benefit and win-win situation.
Why Choose Us
Factory
With our excellent manufacturing technology and strict quality management system, our products enjoy a good reputation in the market. We focus on technological innovation and product development to continuously improve the quality and performance of our products to meet the needs and expectations of our customers.
Quality Assurance
We have always been committed to providing our customers with the assurance of high quality and efficiency to meet their needs and expectations for our products and services.
Produced Products
We mainly productsis full body fairing partsfor scooter motorcycle(mainly HONDA/YAMAHA),and OEM quality enginparts for scootermotorcycle &ATV,UTV.
Superior Service
We have always been committed to providing excellent service and offering all-round support and assistance to our customers.


What is Brake Master Cylinder
Brake master cylinder is a hydraulic component which houses one or more pistons, a brake fluid reservoir, brake lines, seals, and springs. These are arranged in such a manner that the mechanical force applied by a rider or a driver onto the brake pedal/brake lever is converted into hydraulic pressure that eventually brakes the rotors via the brake calipers. The master cylinder multiplies this mechanical brake force (which on its own isn't enough for braking) transferring high pressure on the brake calipers. Braking happens when the master cylinder transfers the brake fluid to the braking circuit as you pull the brake lever.
Advantages of Brake Master Cylinder
Efficient braking
The master cylinder efficiently converts mechanical force into hydraulic pressure, ensuring quick and reliable brake activation.
Safety
The brake master cylinder plays a critical role in maintaining safe braking systems, ensuring the vehicle can come to a stop promptly in emergencies.
Independent braking circuits
In dual circuit master cylinders, separate circuits for front and rear wheels provide redundancy, enhancing safety in case of one circuit failure.
Diagonal braking
Dual circuit master cylinders also enable diagonal braking, further improving stability during braking and enhancing vehicle control.
Uniform force distribution
Single circuit master cylinders distribute equal force to all wheels, ensuring balanced braking performance.
Easy maintenance
With proper maintenance, brake master cylinders can have a long lifespan, contributing to the overall longevity of the vehicle.
How Do Rebuild the Brake Master Cylinder on Motorcycle


Step 1: Remove the master cylinder
It's easiest to remove a lot of the parts around the master cylinder while it's on the bars – take the lever off for a start. If you're working on the back brake, you'll need to detach the master cylinder from the lever, which is usually a pin with a split-pin behind the footrest hanger.
Crack the banjo bolt then leave it finger tight, so no fluid leaks out. Put some rag around the bolt to make sure it doesn't leak while you remove the bolts that hold the master cylinder to the bars, then move it away from the motorcycle, being careful not to kink the brake lines.
Now open the master cylinder and empty the brake fluid into a container, ready to be disposed of at your local tip. Remove the banjo bolt with the cylinder over your container to catch any fluid that drips, then secure the brake lines in such a way that the fluid won't leak out.
Step 2: Remove the rubber boot
Using a right-angled pick, remove the rubber boot that covers the end of the piston, or in the case of the rear brake, that surrounds the threaded plunger rod.
Step 3: Remove the circlip
Using circlip pliers, prize the circlip out of the end of the master cylinder. You might be able to do this with a pick and screwdriver, but it's a lot more fiddly.
Step 4: Take out the piston and spring
The piston should now drop out of the cylinder body. In the case of rear master cylinder, I found it easiest to poke it out with an allen key from the top, where the banjo bolt enters.
Step 5: Check and clean the cylinder
Using brake cleaner and clean paper workshop towels or lint-free cloth, thoroughly clean the inside of the cylinder and any fluid pathways. If it's corroded inside, you'll almost certainly need to replace the master cylinder – look for a second-hand one in good condition if you can, but still rebuild it with new seals.
Step 6: Fit the new seals to the new piston
Lubricate the new seals with fresh, clean brake fluid, then carefully pop them onto the piston, taking care that they go on in the correct locations and are the right way around. You can check them against the old piston, or look at a parts diagram.
Step 7: Fit the new spring
Whether the spring attaches to a seal or the piston, it will likely be wider at one end – check from your old parts how it should go on, or look at a parts diagram.
Step 8: Insert the spring and piston assembly
Drop the spring and piston into the cylinder body, making sure they go in the correct way around.
Step 9: Fit a new circlip
Hold the plunger down then insert a new circlip into the groove inside the body of the master cylinder. Make absolutely sure it's in the bottom groove (not the one that the boot might fit into), and once in, use the pick to check it can rotate within the groove, which proves it's properly seated.
Step 10: Fit the boot
Put some of the red rubber grease into the back of the new rubber boot, then pop it on, making sure it slips into the groove in the cylinder body, and over the end of the piston in the case of the front. If you need to poke it in, don't use anything sharp that could damage it.
Step 11: Fit the cylinder back onto the motorcycle
Refit any items like the reservoir etc (after cleaning them thoroughly), then bolt the master cylinder back onto the motorcycle. In the case of the rear cylinder, you'll need to set the position of the end using the nuts, and make sure the split-pin is back in correctly when connecting it to the pedal; if the pin's in any way damaged, replace it.
Step 12: Fill with new fluid and bleed the system
Follow our simple guide here to bleed new fluid into the system. It can be hard to get rid of any air trapped in the master cylinder, but with rapid pumping it should start to pull through. If necessary, you might want to pull the lever in, then crack open the banjo bolt, closing it again as the lever reaches the end of its stroke – repeat this until the cylinder is properly primed and fluid starts to come out around the banjo bolt be careful not to spill any fluid.
Components of Motorcycle Brake Master Cylinder
Lever or Pedal
This part serves as the means through which the brake master cylinder is operated, allowing the driver to activate the braking system.
Piston
Connected to a push rod and a return spring, the piston slides inside the bore when the brake lever or pedal is pressed, pushing the brake fluid.
Spring Return
In both drum and disc brake assemblies, this component helps the piston return to its original position when the brake lever or pedal is released.
Pushrod
The pushrod is attached to a lever and piston, and when the brake lever is pressed, it pushes the piston, initiating the movement of brake fluid.
Bore
Similar to calliper assemblies, brake master cylinder assemblies feature a bore where the piston moves.
Piston Assembly
Comprising the piston, a series of O-rings/gaskets, a primary cup, a secondary cup, and a return spring, the piston assembly is housed inside the master cylinder's bore.
Reservoir
Usually made of aluminium or cast iron, the reservoir stores brake fluid and has a window for checking fluid levels and colour. Different shapes are used, such as rectangular or square-shaped, and sometimes round-shaped reservoirs are used for rear disc brakes.
Brake Fluid
An essential hydraulic fluid, brake fluid transfers force under pressure and is graded similarly to engine oil, such as DOT 3, DOT 4, etc.
Bladder
Present in open-system master cylinders, the bladder is made of thin-walled rubber, allowing it to expand and contract. It separates the brake fluid from the atmosphere.
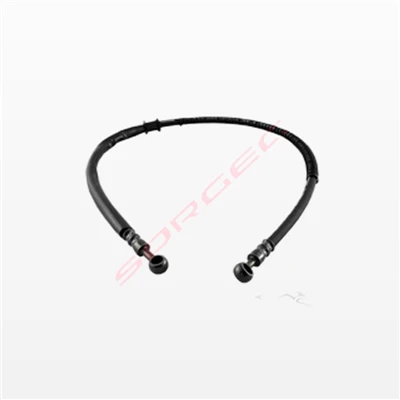
Hosepipes
Tube-like pipes that transport brake fluid from the brake master cylinder assembly to the calliper assembly.
O ring/Series of gaskets
This includes cup or O-ring, primary cup, secondary cup, and circle P. The cup and circle P act as retainers for the piston and are positioned between the pushrod and piston. The primary seal allows brake fluid from the reservoir to flow into the brake hosepipe when the brake lever or pedal is pressed. The secondary seal prevents brake fluid from moving to the other side of the cylinder when the brake lever is activated and acts as a spring retainer.
Clamp
Holds the entire brake master cylinder assembly. When the brake lever or pedal is pressed, the pushrod attached to it and the pistons push the piston, generating pressure in the reservoir tank. The primary seal allows brake fluid to flow from the reservoir to the brake hosepipe. The secondary seal ensures brake fluid doesn't flow to the other side. When the brake lever is released, the return spring pushes the piston back to its o
How the Brake Master Cylinder Works
The brake master cylinder is mounted in front of the brake booster. A reservoir sits on top of the master cylinder and supplies it with brake fluid needed to make hydraulic pressure.
The master cylinder has two hydraulic chambers for safety reasons. If a leak develops in one area of the brake system, the other chamber should remain functional for emergency purposes.
When you apply the brakes, the booster acts on the master cylinder, pushing the pistons inside. Fluid is drawn from the cylinder's reservoir and is pressurized. It then flows from the outlet ports on the side of the master cylinder to the brake lines.
Where the fluid goes from there depends on the vehicle's braking system. Some vehicles have four-wheel disc brakes, while others have discs in the front and drums in the back.
Disc brakes: On vehicles with disc brakes, the lines go to a brake caliper at each wheel. Inside each caliper is a set of brake pads positioned around a brake rotor. Hydraulic pressure from the master cylinder causes the caliper to squeeze the pads against the rotor.
Drum brakes: In a drum brake system, the lines go to the wheel cylinders. Each wheel cylinder is positioned inside a set of brake shoes, fitted inside a brake drum. Pressurized fluid from the master cylinder causes the wheel cylinders to push the shoes outward against the drums.
Types of Motorcycle Brake Caliper
Floating brake calipers
The floating brake caliper has a piston only on one side and brake pads on both sides that make contact with the brake disc rotor. The caliper moves or slides back and forth on bushings or pins. When you apply the brakes the piston pushes the brake pad on one side (usually innerside). The caliper will then slide on the bushings/pins and push the outerside pad closer to the disc rotor making contact with the other side and creating friction that initiates the braking action.
You will also see sliding brake calipers on some motorcycle; the only difference between the two is that sliding calipers are mounted in a slot of the caliper adaptor. Now it's all the same when you apply the brakes with the inner side brake pad, what changes is the outer side where the full caliper body puts pressure on the outer side pad and brings it closer to the disc rotor creating friction.
Fixed Brake Calipers
Like its name, a fixed brake caliper is mounted to a bracket and it does not move. These types of calipers have an equal number of pistons on the inner and outer side of the caliper. They usually contain 2 or 4 pistons on each side. They are known to have better performance as there is an equal distribution of force on both sides of the disc rotor. Hence used on mostly high-performance motorcycles.
It feels like the brakes are always on: If the caliper is stuck in a way that doesn't let the brake pads fully release, it will feel like your motorcycle isn't going as fast as it should, or like the parking brake is on.
Your motorcycle pulls to one side: This can happen when braking or when just driving. Typically, pulling to the right or left is a sign that you need a wheel alignment, but it can also mean you have a stuck caliper piston.
Brake fluid leak: Wear and tear or a faulty piston can cause a brake fluid leak. This usually is caused by breakdown of protective rubber seals that let this mechanism to move, and can happen in both fixed and floating caliper systems. You might also smell burning rubber.
Reduced braking power: This can be another sign of a brake fluid leak. If your motorcycle is low on brake fluid, you may feel little or no response when you press the brake pedal. Another possibility is that your caliper sliders are stuck. If they get dirty or gummed up, it can hinder their ability to clamp down. This is fairly common in floating caliper systems and will be feel like your brakes are spongy — like it takes extra effort to make the vehicle stop.
Brakes make odd sounds: Despite the temptation to crank your radio up to drown out the sound of your brakes grinding, it's much wiser to take care of the problem. When you have caliper issues, the brakes may be very loud when you try to stop. It can be a high-pitched screech, a thud or a metal-on-metal grinding noise. These sounds can mean that your caliper is stuck, that it has come loose or that it's having some other problem.
How to Maintain Motorcycle Brake Calipers
The most common causes of caliper and piston damage are road debris, weather-induced dryness or cracking, and deterioration caused by aging. As a result, when a caliper seal breaks, the brakes may lose hydraulic pressure, and brake fluid may leak. However, the major reason behind damaged brake calipers is driving the motorcycle on damaged rotors or brake pads. Therefore, it is essential to maintain your brake calipers. Here are some tips for the same.
Clean and grease the sliding mechanisms with high-temperature brake grease to preserve the full range of travel. For instance, this will help ensure that the calipers stay centered on the rotor and that even pressure is applied to both sides of the brake pads.
Inspect the dust boots protecting the caliper piston and the two slide pins for any damage or tears. These boots prevent dirt and moisture from fouling the action of the associated parts. If any damage is found, replace the boots immediately.
If the calipers seize, it is possible to disassemble them, clean the parts, and replace the boots. However, this can be time-consuming and difficult, so simply replacing the calipers is often more practical.